

If you’ve recently received a new CPAP or APAP machine, you likely have questions about the many settings on your device and how they affect your therapy. In this article we will review the settings and functions available to patients for two brands of PAP: The Dreamstation & the AirSense 10.
Although these two models share identical functions, the organization and accessibility is based on the manufacturer’s preference. Below I’ve provided a setting description guide for each machine, as well as instructions for navigating the menus.
Menu Navigation
On both machines, you will notice a large circular button to the right of the screen. This is your navigation dial for selecting menus and altering settings. To select a menu item, rotate the dial left to travel up and right to travel down. Once you have highlighted an item, press the dial to select it then rotate the dial to adjust it. Once the setting adjustment has be chosen, press the dial once again to confirm the setting change. Return to the main menu or leave your machine alone so it reverts to sleep mode.
The Dreamstation by Philip’s Respironics
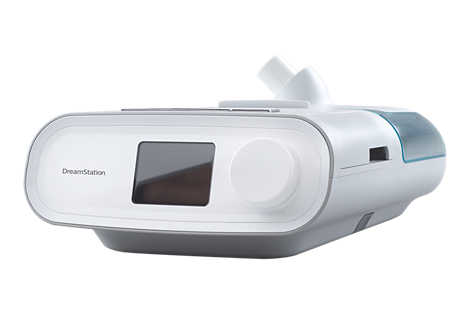
The Dreamstation has several menu options which at first may seem overwhelming, but are actually well organized and simple to navigate. The interactive interface has 4 menu options to choose from. Descriptions of each menu can be found below.
My Info:
This menu allows you to view some elements of your sleep therapy data, like your usage hours and mask fit. To better understand the information provided I recommend reading the “understanding feedback” section of your user manual.
You also have the option of downloading the Dreammapper app on your phone and connecting to your device either via Bluetooth or receiving daily data uploads when the machine reports back to your DME company’s data monitoring site. I’ve provided a link to the Dreammapper site here.
My Provider:
This is where you’ll find the majority of the machine’s technical information / functions such as the serial #, performance check, and data upload. Likely the only time you’ll need to access this information is when your doctor or supplier requests it to assist with technical support.
Preheat:
This Function allows you to preheat your humidifier up to 30 minutes before you begin therapy. Select the function and set a timer for yourself to begin therapy before the preheat shuts down.
My Set Up:
This menu is where you’ll find the majority of your adjustable comfort settings. I’ve provided detailed descriptions for each setting and how they will affect your therapy. However, you should not hesitate to reach out to your DME supplier or Doctor for assistance if you find your therapy ineffective or uncomfortable.
Tube Temperature & Humidity:
These two separate settings work together to ensure you’re receiving the right amount of moisture in your air without condensation building up in your tubing or mask.
The Humidifier produces the moisture and has a setting range of 0-5. The Tube Temperature has a range of 0-5 as well and keeps the moisture in check. Keeping a proper balance is key, so as a rule of thumb you should keep each setting within one level of each other.
Example: If the humidity is on level 3 then tube temperature should be on level 2, 3, or 4!
If you would like more information on adjusting these settings, visit our article in the FAQ section about dry mouth and condensation.
FLEX:
One of the most common complaints about therapy is difficulty breathing against that intense air pressure. This setting is commonly known as “Exhale Pressure Relief” and it allows you to decrease the incoming pressure by 1-3 units when you exhale, making it easier for new CPAP users to breathe normally.
Example: Let’s say you have a fixed pressure of 10cm and your FLEX is adjusted to level 3. When you exhale the pressure will be lowered by 3 units, reducing the pressure to 7cm.
Mask Fit Check:
This function allows you the ability to test your mask seal before going to bed. The better your mask seal, the less likely air is to escape, which could ultimately lower the benefit of your therapy. We highly recommend using this function if you’re just starting therapy.
Begin by putting on your mask and starting Mask Fit Check. Your device will start blowing out a small amount of air for 40 seconds and the timer and leak bar will appear on the screen. If the leak bar is green for the allotted time you will receive a check mark. You should then end the check and normal therapy pressures should start on their own.
If you do not have a proper seal the leak bar will be red and you will get an “X” at the end of the 40 seconds. If this happens, start it again and continue adjusting your mask throughout the fit check until you get a check mark.
If you are unable to get a good seal, reach out to your doctor’s office or DME supplier for assistance.
Time, Modem, & Bluetooth:
These settings are pretty self-explanatory. You can use Time to adjust the clock on your machine, modem allows you to turn the cell/wifi signal on or off (good for traveling on a plane), and Bluetooth of course allows you to create a wireless signal to pair your phone.
The AirSense 10 by ResMed

The ResMed AirSense 10 has a simple menu design that allows patients to access both their sleep therapy data and comfort settings with ease. When starting on the main menu there will be two options to choose from: Sleep Report & My Options.
Sleep report
This menu allows you to review your usage data from the previous therapy session. This provides information on the length of your usage, your mask seal, and instructions on how to get started with MyAir; an easy to use program designed to link to your machine so you can review more detailed therapy data on your computer or phone. We recommend you use the information from this menu or app to better track your progress.
My Options
This menu is a list of all available comfort settings that patients can adjust as needed. There is a description of each setting below to better help you navigate your device, however you should not hesitate to reach out to your DME supplier or Doctor for assistance if you find your therapy ineffective or uncomfortable.
Ramp Time:
When enabled, ramp delays the pressure for an allotted amount of time between 5-45 minutes. This will cause your pressure to start at a lower number (such as 4-5cm) and slowly increase to the fixed pressure or pressure range prescribed by your doctor.
You can also enable Auto Ramp which cause the machine to keep the pressure in the lower ranges until it senses a change in your breathing patterns, indicating that you’ve fallen asleep.
Tube Temperature & Humidity:
These two separate settings work together to ensure you’re receiving the right amount of moisture in your air without condensation building up in your tubing or mask. With your device these settings will likely be locked when you first receive it. To adjust them you will need to find a third setting called Climate Control and switch it from “auto” to “manual” before adjusting the aforementioned settings.
The Humidifier produces the moisture and has a setting range of 0-8. The Tube Temperature has Fahrenheit range of low 60’s to 86 degrees. Keeping a proper balance is key so as a rule of thumb, if you have the humidity at 4 and up, the tube temperature should be at least 80 degrees.
If you would like more information on adjusting these settings, visit our article in the FAQ section about dry mouth and condensation.
Mask:
This setting allows you to tell your machine what kind of mask you’re using so it can provide a better therapy experience. It gives you the choice of nasal (over or under the nose), pillow (in the nose), or full face mask (over the mouth and nose).
Run Mask Fit:
This function is used to test your mask seal for air leaks before you begin therapy. Before activating the function put on your mask so it feels sealed, but comfortable. Start the function and the machine will begin blowing out a small amount of air and a smiley face or sad face will appear on the screen. If the face is green, stop mask fit and begin your therapy. If the face is red / sad, readjust your mask until you see the green smiley face.
If you cannot get a proper mask seal, reach out to your doctor’s office or DME supplier.
Run Warm Up:
This Function allows you to preheat your humidifier up to 30 minutes before you begin therapy. Select the function and set a timer for yourself to begin therapy before the preheat shuts down. Use this function to select the amount of time you would like preheat to run.
Clinical Menu Settings
You may have noticed there are some settings, like your pressure, that are not available in the menus laid out above. That is because settings like your pressure should only be adjusted by a trained medical professional as they will significantly impact your OSA therapy. If you have questions about these settings, how they impact your therapy, or if you think you need some form of adjustment you should reach out to your doctor or DME supplier for assistance.
– Nathan Eastman
*This content is not intended to be a substitute for professional medical advice, diagnosis, or treatment. Always seek the advice of your physician or other qualified health provider with any questions you may have regarding a medical condition.